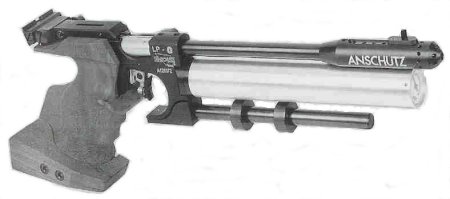
ANSCHUTZ LP@
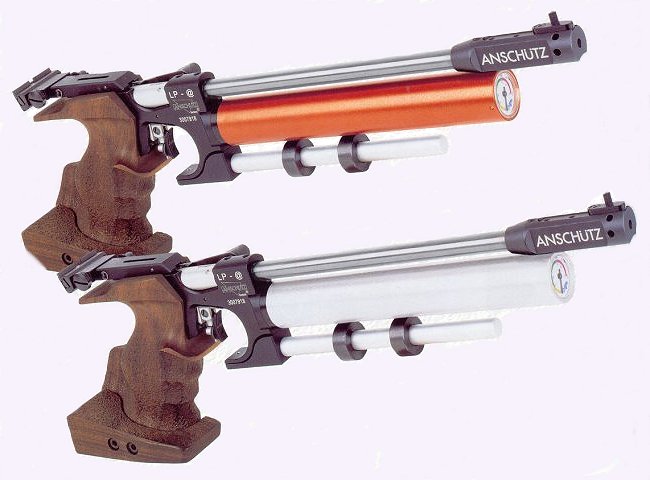
The Anschutz LP@ is in effect a slightly modified Steyr LP10, complete with recoil absorber, but different style grip, no barrel shroud and an independent weight bar. Both factories have worked together since 2002, sharing manufacture of components for their air pistol lines.
Sight Adjustments
Clockwise down (left hand knob).
Clockwise left (right hand knob).
1 click = 1.2mm @ 10m.
Adjustable rear Notch
Turn screw on right hand side clockwise or left hand anti-clockwise to increase sight aperture width, opposite to decrease. Adjustment is 0 – 5.0mm.
Depth may be adjusted by loosening screws holding cover plate in place, and lowering or raising cover plate to desired position before retightening. Adjustment is 1.8 – 2.6mm.
Front Sight
A triangular front sight comes standard, with three different widths. By loosening set screw holding it in place, it can be rotated to give 3.5, 4.0 or 4.5mm width front sight.
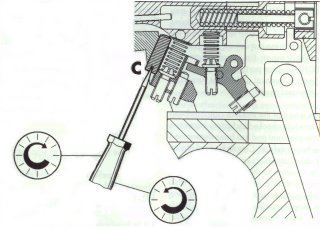
Trigger Adjustments
| Trigger Stop Turn screw C clockwise to shorten after travel. Note: If screw is tightened too far pistol will not fire. |
 |
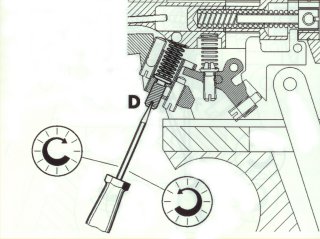
| First Stage Weight Turn screw D clockwise to increase first stage trigger weight. |
 |
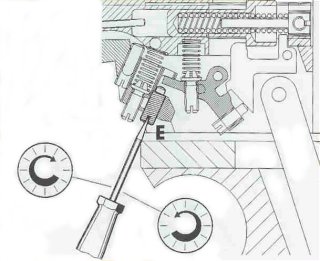
| First Stage Travel Turn screw E clockwise to shorten first stage travel, counter-clockwise to lengthen. After adjusting 1st Stage Travel the trigger stop should be readjusted. |
 |
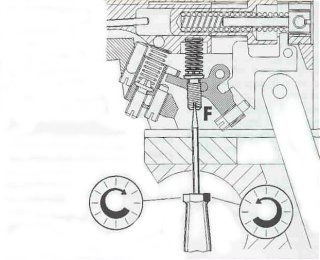
| Second Stage Weight To access screw F, you must first remove the grip. To increase second stage weight, turn screw F clockwise. Sear Engagement The manual does not recommend changing factory setting. Sear engagement screw is directly behind screw F, and can also only be accessed with the grip removed. |
 |
Grip Adjustment
The grip is adjustable and pivotable in relation to the pistol in all directions. It can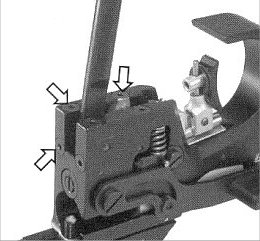 therefore be adjusted to most any possible shooting stance and hand position.
To adjust, first remove grip by unscrewing allen screw in base of grip.
Adjustments are made by positioning of countersunk screws located at the bottom and rear of the receiver, as shown in the diagram.
Dry Firing
Pull cocking lever up and rearward until it clicks.
Push it forward and down until you feel a first resistance. From the left hand side you will see the letter “T” (Train).
Pistol can now be dry fired, with no expulsion of gas.
Note: When pistol is cocked for live fire, lever is pushed down hard, and the letter “F” will be visible (Fire).
|
|
|
Early and pre-production pistols featured a cylindrical compensator. The modified compensators shown at top of page were later adopted for the production runs. |