DAISY XS40 — AVANTI VALIANT
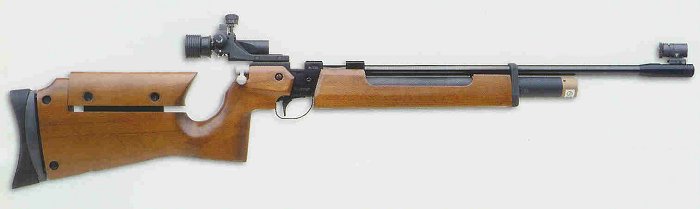
Note: Rifle shown has Anschutz match sights. Stock rifles come with Gamo match sights; it is not allowed to replace these in Sporter Class rifle competition.
Sight Adjustments
These instructions are for Gamo read sights:
Clockwise up.
Clockwise right.
Variations
Since its release in 2001, there have been minor variations on this model.
1st Generation
Butt stock was longer, and the check piece height was not calculated to work with the Gamo sights (it was too high). The factory rectified this by retro-fitting a set of riser blocks. It is only permissible to use rider blocks on these early rifles for Sporter Class.
Trigger shoe was metal.
There was no clamp around the front of the fore-end and the barrel. There was also no cutaway in the fore-end showing part of the cylinder.
Butt stock could be removed with a flat blade screwdriver.
2nd Generation
Butt stock was altered more to junior specs, and the cheek piece height was corrected. However, no butt spacers were supplied with the rifle to extend the length of pull for bigger kids.
Trigger shoe was plastic. This was a problem for awhile, as breakage was common. The factory then supplied a larger-headed screw to spread the load — breakages are now rare.
The fore-end clam was added, with new styling to the wood work.
For a short time the muzzle cap, or front sight base, was plastic. This could split if the locking set screw was over-tightened.
The lock nut for the butt stock was changed to a slotted nut, requiring a special tool for removal of the butt stock.
Pressure gauge on the end of the cylinder was changed, no longer giving the red graduations of over 200 BAR or under 120 BAR.
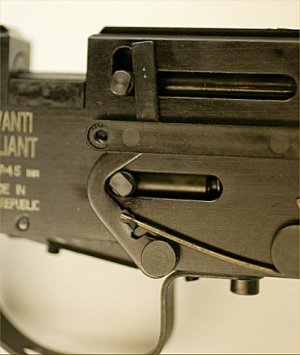
Trigger Adjustment
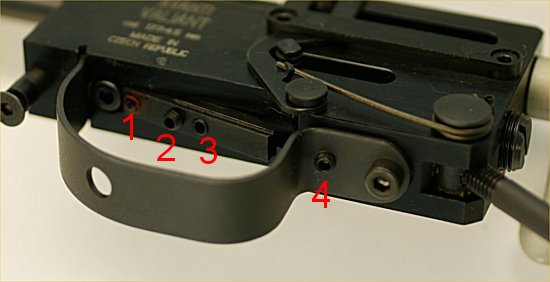
To adjust trigger to 1 ½ lb:
Ensure rifle is unloaded, make sure cylinder is not attached.
- Turn screw #4 clockwise until it is about three threads above flush. Beware of turning screw clockwise too far, it is possible it may fall inside the action.
- Turn screw #2 counter clockwise about three or four full turns from flush.
- Turn screw #3 (it may be obscured by the trigger shoe) until it is flush. Check to see if it will pick up the 1 ½ lb weight. Turn screw #3 clockwise to decrease and counter clockwise to increase weight.
- To adjust slack in the trigger (to make it single stage), turn screw #1 clockwise half a turn at a time. Cock the action. If it catches, pull the trigger and go another half turn. Repeat this until the action will not cock. Then turn screw #1 counter clockwise about 1/8 of a turn. Repeat until the gun will cock. We recommend this adjustment because the first stage trigger spring can be displaced or fall out if there is too much takeup.
Stripping
Ensure the rifle is unloaded. Remove cylinder. Remove the fore-end screw with Allen wench. You can then remove the fore-end forward.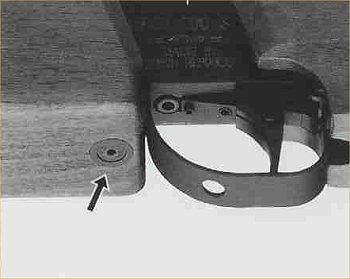
Barrel assembly can be removed (if required) after loosening the two M5x6 socket head screws in the front part of the receiver.
The butt stock can be removed by removing the side screw and nut through the bottom of the pistol grip (as shown). For early model Valiants a flat bladed screwdriver is required. Later models need a two-pinned driver to remove a slotted nut. Pilkguns carries this tool, or you can make it from a 7mm (or thereabouts) nut driver ground to fit.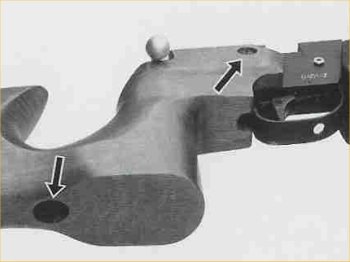
Situations You May Encounter
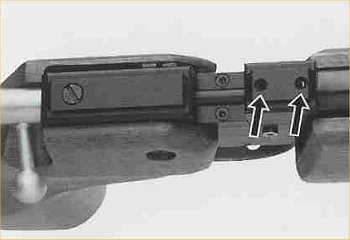
- Screws #18 and #27 may back out. This will cause a drop in velocity as the end
 of the cocking screws foul the inletted part of the stock (shown in photo on right). If this should happen, send rifle back for repair.
 - Screw #61 may fall inside the action (referred to in Trigger Adjustment 1). A trigger spring will also be dislodged. To retrieve this screw and spring you should remove the trigger guard (screw #59). When replacing spring there are locating tips on the sear and the screw to hold it in place.
- If the trigger has too much take-up spring #68 may come loose and the trigger will no longer work.
- Part #1 (front sight base aka muzzle extension) is sometimes made of plastic. If you try to over-tighten the set screw holding it on the barrel it will strip out or break the molding.
- Trigger shoe is plastic, and may break if the clamping screw is over-tightened.
- Butt stock screw has been changed to a spanner nut that takes a special tool to remove. We have a special tool available if required.
- This gun is not pressure regulated, so it is unwise to adjust the velocity (normal velocity should be 560-580 fps). By increasing velocity there will be a wide variation in pellet speed, plus the number of shots will drastically drop per cylinder.
