DAISY 717/747/777 AIR PISTOL

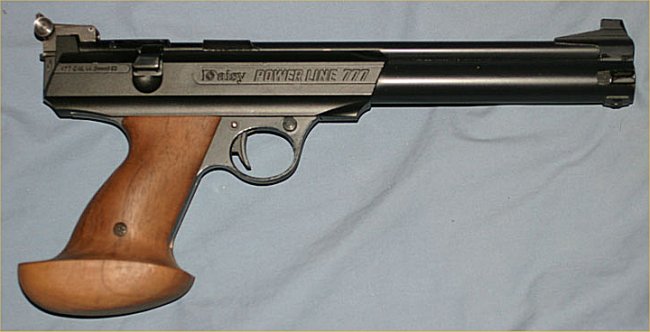
All three models are identical as far as the action is concerned. The 717 is the base model. The 747 has a Lothar Walther barrel. The 777 was discontinued a few years ago, having Lothar Walther barrel, wooden grips and adjustable metal sights (717 and 747 are adjustable but plastic).
Sight Adjustments
Elevation: Clockwise down. 1 click = 0.077″ @ 10m.
Windage: Clockwise right. 1 click = 0.054″ @ 10m.
Trigger Adjustments
Trigger weight: Adjusting screw is located in front of grip frame directly below trigger guard. Turn clockwise to increase. Approximate range of adjustment 1-3 pounds.
Stripping
Our thanks to Nick F. for the use of his details and photos for stripping and inspection of Daisy 7×7 seals.
| To start off, lay the pistol on its right side and open the cocking lever. Make sure that the safety is to the right, or on safe, or it will go flying when you open up the pistol!(4).Opening the bolt will make things easier too. Then remove screws (1,2,&3). | 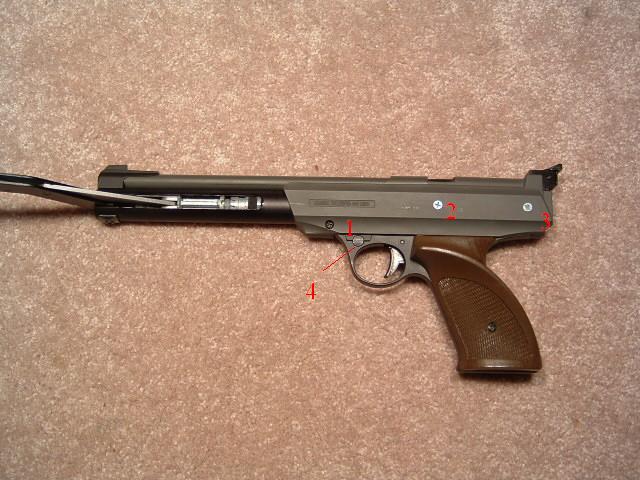 |
| Remove the left side cover and pull the grip back and away. Circled is where the cocking arm meets the valve. | 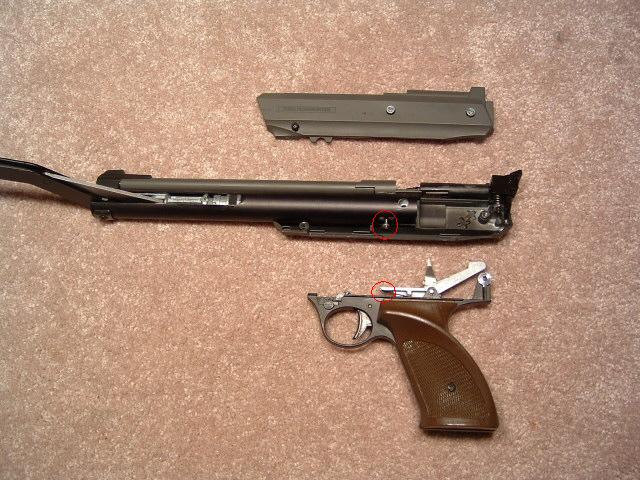 |
| Remove the right side cover and close the cocking arm which usually pops the barrel and valve out the back. Or you can pull them out. There is nothing holding them in but friction. | 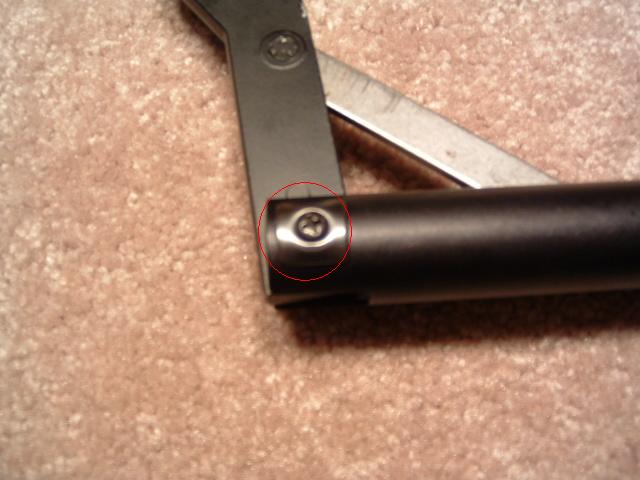 |
| Now remove this screw,(circled above) pull the front sight off from the top, then remove the cylinder that goes through the pump arm and the two spacers. Now slide the pump arm out with the attached pump head. | 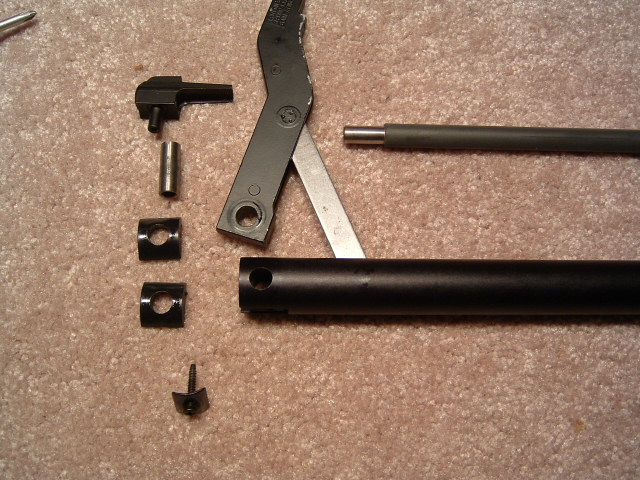 |
| Inspect the seal circled for wear. I would gently remove it and wipe it clean and clean out the pocket it sits in with q-tips and then apply some airgun suitable oil to the seal and the sponge wiper behind it. Set aside in a clean place. | 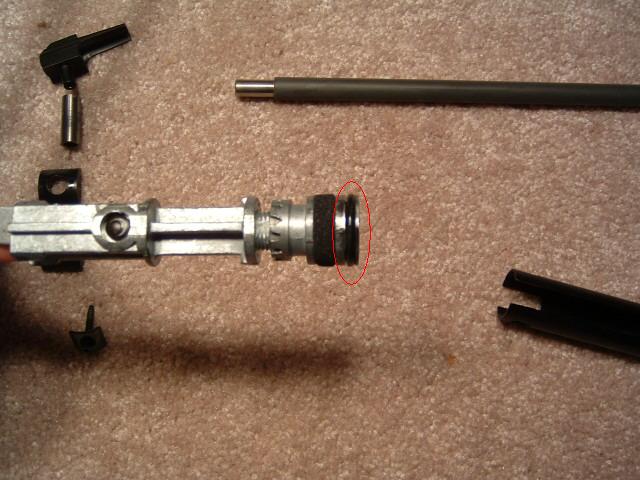 |
| Now inspect the seal in front of the valve body(5) Clean the seal and the pocket it rides in again and re-oil. | 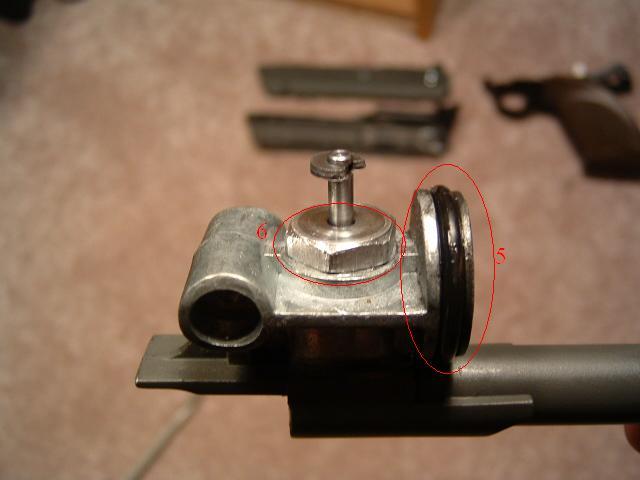 |
| Now remove the valve assembly (above 6) with a wrench and clean the valve stem (circled)… | 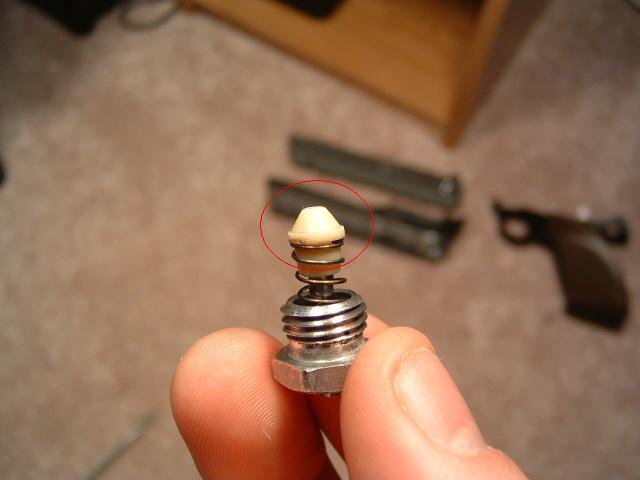 |
| …and the inside of the valve body with q-tips and again use a light coat of oil. | 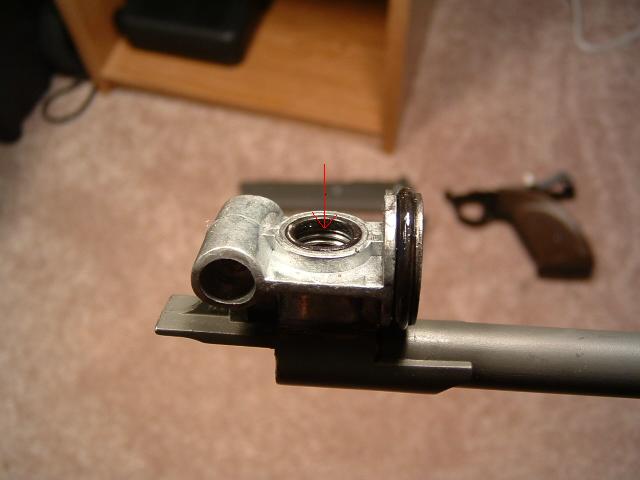 |
| I would also take the time to clean out the pump tube and anything else that looks gritty. Assemble in reverse order. There are some things to know on reassembly. There is a safety for the bolt which prevents the gun from firing without the bolt closed. The safety lever must go in front of the bolt or your gun will not fire after you put it back together. Shown in the proper location with the bolt closed. If any of the seals are not servicable a set of 3 seals from Daisy is available at a minimal cost, part# 717-5 (“O”ring seal group). | 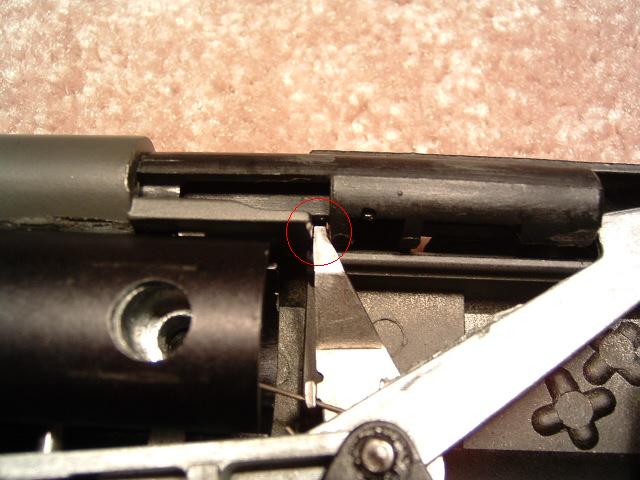 |
Here’s the a seal and valve repair procedure from RicDoug on the Yellow Forum:
If it’s just the adjustment, it’s a quick fix:
![[linked image]](http://www.pilkguns.com/tenp/daisy23320747_adjust.jpg)
Schematic: click here to enlarge
![[linked image]](http://www.pilkguns.com/tenp/daisy23320dais717.jpg)
Here’s photo’s of when I repaired Mal’s 777. If you take it apart, replace the seals and the valve:
Remove the handgrip screw
![[linked image]](http://www.pilkguns.com/tenp/daisy233207771.jpg)
Remove other handgrip screw. MAKE SURE THE SAFETY IS ON OR THE SAFETY SPRING AND BEARING WILL FLY OUT WHEN OPENED!
![[linked image]](http://www.pilkguns.com/tenp/daisy233207772.jpg)
Remove upper receiver screws
![[linked image]](http://www.pilkguns.com/tenp/daisy233207773.jpg)
Seperate piston/barrel assembly. Remove the cocking arm pivot screw
![[linked image]](http://www.pilkguns.com/tenp/daisy233207774.jpg)
Remove barrel, front sight and piston from chamber. Unscrew old valve and remove old seals and felt washer
![[linked image]](http://www.pilkguns.com/tenp/daisy233207775.jpg)
The new valve is rounded. The old valve is worn almost conical. The felt washer disentegrated.
![[linked image]](http://www.pilkguns.com/tenp/daisy233207776.jpg)
New seals and valve installed. Old seals and valve on bottom
![[linked image]](http://www.pilkguns.com/tenp/daisy233207777.jpg)
Apply a touch of Moly Paste to the seals
![[linked image]](http://www.pilkguns.com/tenp/daisy233207778.jpg)
Assemble in reverse order. Pay special attention to the silver safety lever position in the bolt
![[linked image]](http://www.pilkguns.com/tenp/daisy233207779.jpg)
Before repair
![[linked image]](http://www.pilkguns.com/tenp/daisy23320777chbef.jpg)
After repair, with Lemon Oil hand rubbed into the grips
![[linked image]](http://www.pilkguns.com/tenp/daisy23320777chaft.jpg)
Trigger before (777 and 747 triggers are adjustable by the small screw on the front of the handgrip frame) adjustment
![[linked image]](http://www.pilkguns.com/tenp/daisy23320777trigbef.jpg)
After
![[linked image]](http://www.pilkguns.com/tenp/daisy23320777trigaft.jpg)