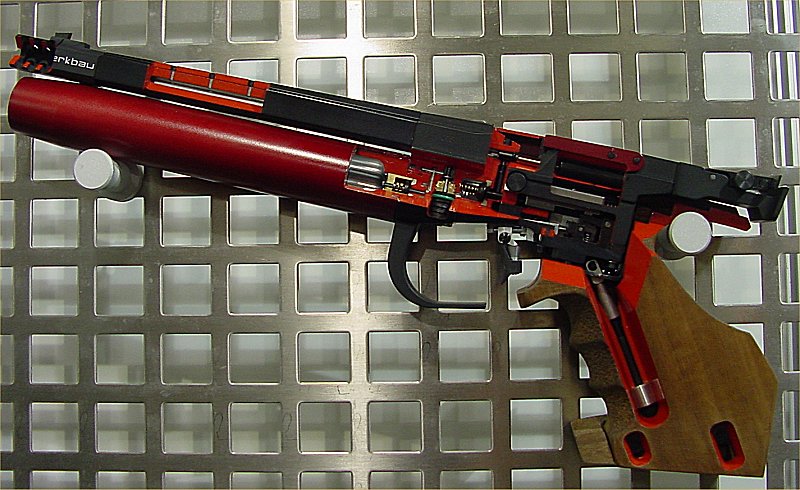
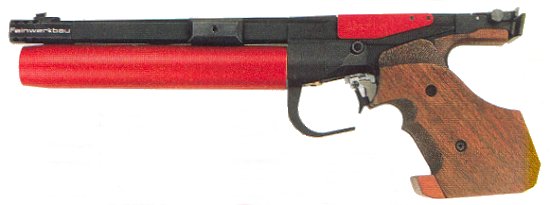
FEINWERKBAU P34
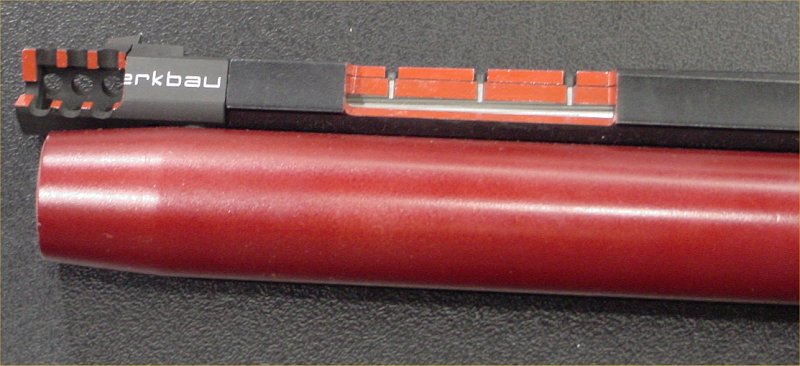
Sight Adjustments
Clockwise down.
Clockwise left.
1 click = 1.5mm @ 10m.
The rear sight notch (III) can be adjusted in its width by screw #7. Maximum width 4.8mm.
Grip Adjustments
 The P34 grip angles may be adjusted in the following ways:
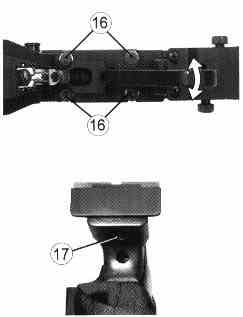
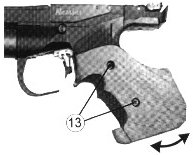
Inclination
The grip rake may be adjusted up to 10 degrees by loosening screws #13, positioning the grip at the desired inclination, then retightening screws #13.
Grip Turn
The grip is adjustable 3 degrees either direction in relation to the barrel. Remove grip by unscrewing both #13 screws, lightly loosen screws #16, turn grip frame to desired position, then retighten screws #16. Filling piece below rear sight may also be repositioned by loosening screw #17, shifting the piece, then retightening #17.
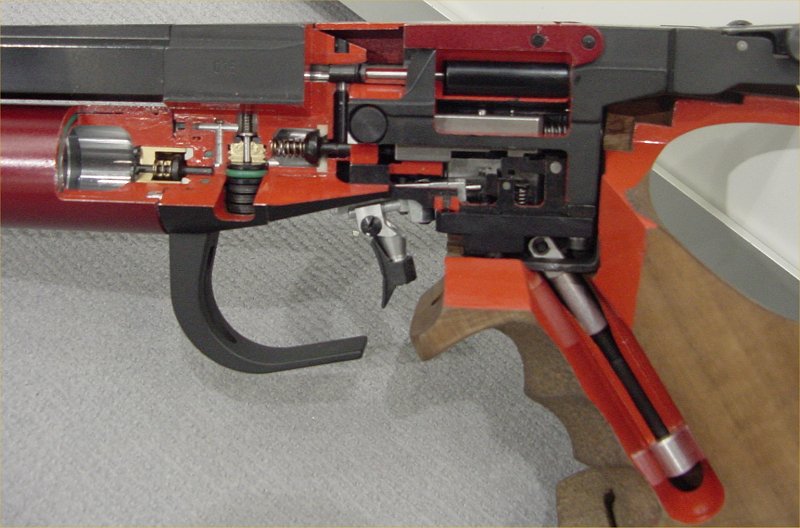
Trigger Adjustments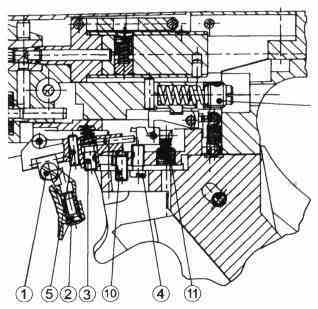
Takeup Weight
Turn screw #3 clockwise to increase first stage weight.
Trigger Point Weight
Turn screw #11 to increase trigger weight at point of release.
Takeup Travel
Turn screw #10 anti clockwise to increase first stage travel.
Trigger Stop
Screw #5.
Sear Engagement
It is recommended not to change factory adjustment. If this has already happened, the following will give a setting similar to original:
1. Turn screw #5 (trigger stop) approx one turn anti clockwise.
2. Cock the trigger.
3. Set to dry fire (see below).
4. Turn screw #4 slowly clockwise until the trigger releases.
5. From this point back off screw #4 10 minutes to a quarter turn anti clockwise.
6. Readjust screw #5 (trigger stop).
Dry Firing
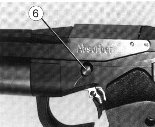 Set the pistol on dry fire mode in the following manner:
1. Cock the pistol.
2. Press the catch-bolt #6 to the left into the dry fire position.
3. Close the breech flap.
4. Operating the trigger in this mode will allow safe dry firing without releasing air.
To return to live fire mode you must again cock the pistol before pushing the catch-bolt to the right.
Absorber
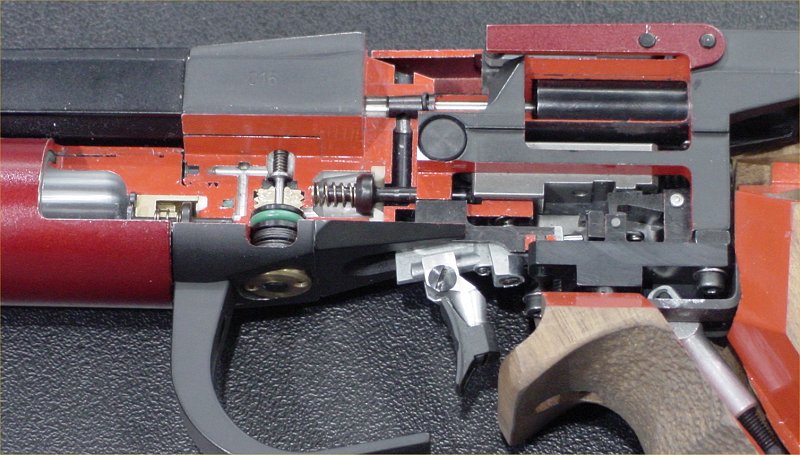
 The P34 has a recoil absorber integrated in its receiver. When the trigger is released the valve at the intermediate chamber is opened by the firing piece and the propelling charge released. The propelling charge will drive the pellet out of the barrel, simultaneously the piston of the absorber is driven to the rear via a push rod inside the bolt. Due to the counter acting masses (of pellet and piston) the pellet impulse felt by the shooter is significantly reduced.
Adjustment
The absorber has been adjusted at the factory. Should the recoil behaviour of the pistol change, ie if the shooter notices muzzle jump, the absorber should be readjusted:
1. Cock and load the pistol.
2. Aim at safe backstop.
3. Fire pistol in a horizontal position.
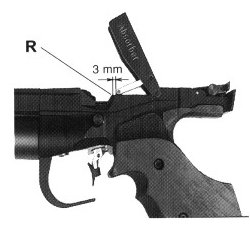
4. Open slowly and carefully the flap until a slight resistance is felt.
5. Check how far the breech could be opened until the position at which the resistance is felt. Reference is the edge of the breech (R).
6. The function of the absorber is okay if the strap underneath the flap – when opening it – being at the edge of the breech (R) or up to 3mm further.
7. If no resistance is felt when reaching the indicated position, or resistance is felt before the edge, the absorber must be readjusted.
No resistance is felt after indicated area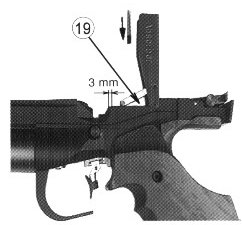
If the distance is too close to the rear sight holder, pull loading flap to its end position.
Turn screw #19 clockwise using a suitable screwdriver.
Check rearward piston movement (repeat procedure 2 through 4 several times).
Resistance is felt before indicated area
If the distance is too far from the rear sight holder, pull loading flap to its end position.
Turn screw #19 anti clockwise using a suitable screwdriver.
Check rearward piston movement (repeat procedure 2 through 4 several times).
Cutaway Views