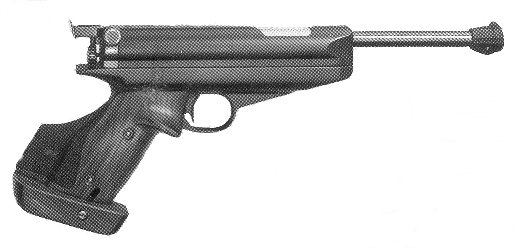
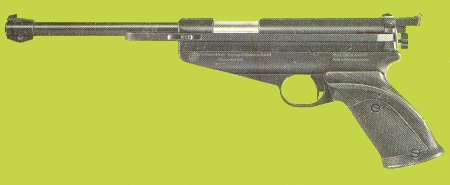
FEINWERKBAU MODEL 65
Sight Adjustments
If shots are high turn towards H (clockwise).
If shots are to the right turn towards R (clockwise).
1 click = 1.5mm @ 10m.
Rear sight gap is adjustable by winding the spindle in front of the rear sight blade.
Trigger Adjustments
Note: Before making adjustments the sliding part of the action should be in the forward position.
Sear Engagement
The screw for this is situated behind the trigger (#2). Turning to the left gives a crisp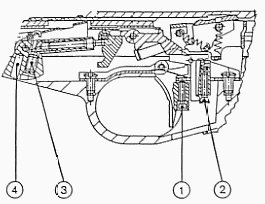 letoff, while turning clockwise gives a rolling release.
Trigger Weight
Turn screw in front of trigger guard (#3) clockwise to increase weight.
Trigger Stop
This is situated directly behind the trigger (#1).
Center Fire Trigger Weight Adjustment
Insert the special wrench and push forward towards the muzzle until the marking 1.36 becomes visible.
Simulated Recoil
If recoil is required for practice (for center fire events) the slide can be locked in place by attaching metal plate with screw, both provided with the pistol.
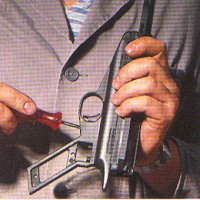
Disassembly
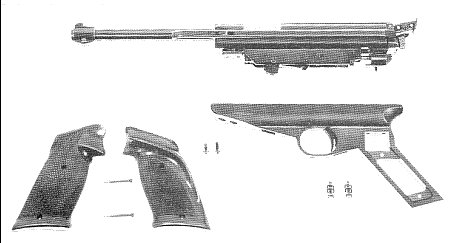 |
As the manual states: “Never forget. A spring-operated air pistol is always under internal pressure. When cocked it amounts to more than 40kg (88lb)! A complete dismantling job should be done only by an expert.” Discharge pistol. Detach stock pieces. Loosen both cross-slot screws on the front bottom surface and the two hexagonal-socket head screws (3mm) under the stock. Remove sledge from the grip frame. |
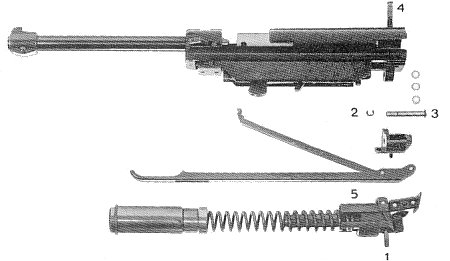 |
Remove clamping bracket by loosening screw (1). (This screw is caulked to prevent unintentional loosening, and must be recaulked for assembly.) Remove lockwashers (2) with spacer rings and also rear guide shaft (3). Loosen screw (4), press end piece (5) forward with a forked piece of wood in order to protect the sight and completely pull out screw (4). Careful with the spring! The spring is now pressing the end piece with the sight torard the rear. Piston, spring and end piece (5) can be removed. (The cylinder can be taken out only after loosening of the two rear assembly pins and removal of the parts assembled on them.) Assembly This is made in reverse sequence of operations. Be sure to get the spacer rings with the lockwashers back into their former position. Above all, piston and cylinder must not be greased. They are to be lightly coated with a permanent lubricant containing molycote. |