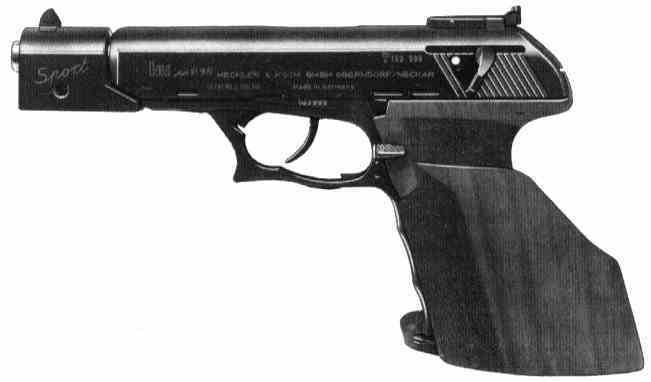
H&K P9S COMPETITION
Sight Adjustments
Clockwise down.
1 click = 15mm @ 25m.
Clockwise left.
1 click = 10mm @ 25m.
Trigger Adjustments
Sear Engagement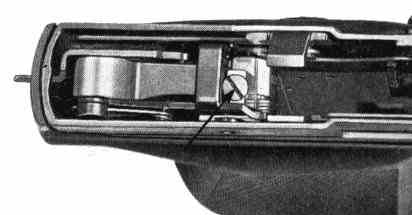
Trigger can be set for a crisp letoff with the sear engagement screw:
1. Remove the slide and cock the hammer. Turn set screw as shown clockwise slowly until the hammer falls. Now back off the screw one half turn.
2. Replace the slide, pull all the way back and allow to snap forward again. The hammer must not disengage. If it does, it is set too finely and the screw must be backed off further. If set too finely the pistol could maxim. If this happens, turn the screw back even further.
It is not possible to regulate the trigger weight.
Trigger Stop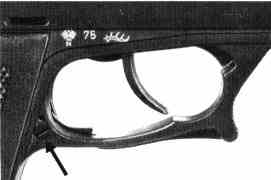
This should be adjusted after setting sear engagement.
The trigger stop is located in the trigger guard on the receiver. If set for single action target shooting it will not allow double action firing. To set, loosen screw shown in diagram and swivel stop into place behind trigger, allowing as little as possible after travel. Retighten screw when stop is correctly positioned. If double action shooting is necessary, loosen screw and swivel stop away.
Setting Up Barrel Weight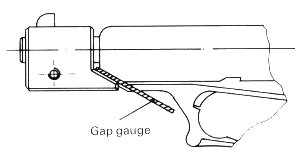
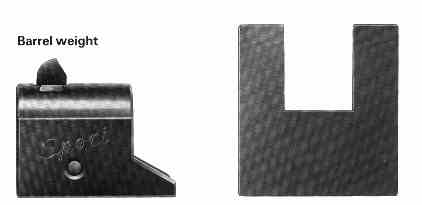
The barrel weight is mounted with the pistol in the closed position. Mount the barrel weight and position the gap gauge at the front end of the slide. Tighten the barrel weight screw and remove the gap gauge. Draw back the slide and let it snap forward again. Check whether the gap between barrel weight and slide is correct.
Mounting Wooden Grip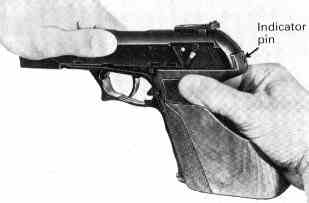
Prior to mounting the wooden grip, cock the hammer and fit the wooden grip so that the indicator pin can pass freely through the slot provided in the grip. Then slide the grip in its final position and tighten the grip screws.
Stripping
| Engage safety. Check pistol is unloaded and remove magazine. Close slide. Press the barrel clamp in the trigger guard forward and upward. Move the slide as far forward as it will go and lift off. | 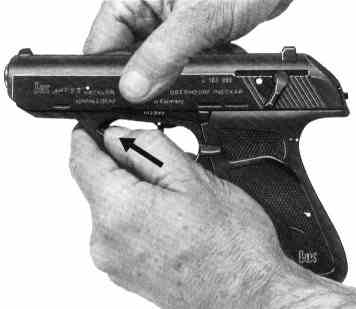 |
| To remove the barrel, push it forward against the pressure of the spring until it can be removed from the slide. | 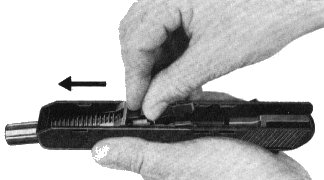 |
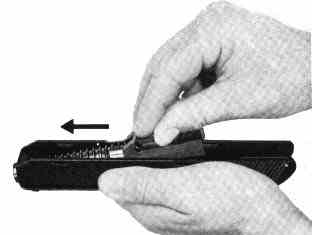
| To remove the bolt head, use the end of one shank of the barrel extension, press against the locking latch between bolt head and slide, until the bolt head can be pushed forward and the bolt can be removed. | 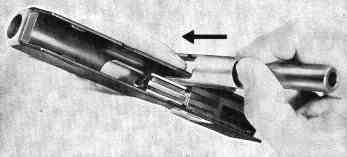 |
| Reassembly: Safety requires that both rollers be in place in the bolt head when assembling the firearm. To insert the bolt head, place its rectangular opening on the locking piece (extractor toward the ejection port) and, as when removing, press the locking lever downward with one shank of the barrel extension and pull the bolt head back again until it engages. Push the barrel with recoil spring (wider diameter facing forward) through the hole in the slide at an angle, against the pressure of the spring. Then place the barrel entirely into the slide and permit it to slide back until the locking rollers engage. |
 |
| Place the slide on the receiver in such a manner that the front guide lugs can engage in the corresponding recesses in the receiver. Press the slide into the receiver, pull back and permit it to snap forward again. | 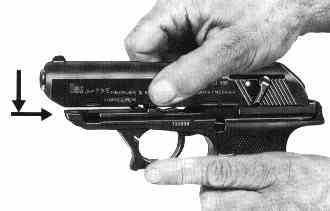 |