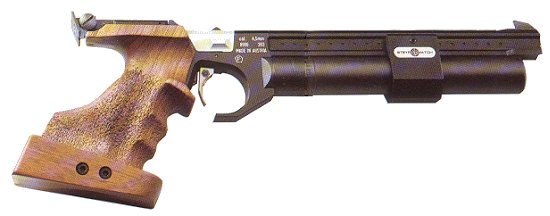
STEYR LP1 OLD MODEL
Sight Adjustments
Clockwise down (left hand knob).
Clockwise left (right hand knob).
1 click = 1.2mm @ 10m.
Trigger Adjustments
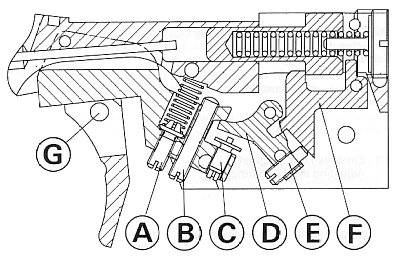
Trigger Stop: Turn Screw B clockwise to reduce after travel.
Sear Engagement: This is adjusted at factory. Should readjustment be necessary, remove grip, cock action and turn Screw E clockwise slowly until trigger releases. Recock trigger and turn Screw E counter clockwise – until a second stage can be felt in the trigger before it releases.
First and Second Stage Weight: This is adjusted by Screws A and C in tandem. Screw A is essentially the takeup weight, Screw C is an eccentric which has three positions that alter the second stage (or letoff) weight. The following table shows the three variants of settings.
Trigger Weight Balance
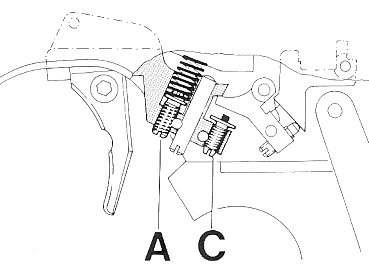 |
Factory Setting This shows roughly how the trigger was set in the factory, with approx 350g on the first stage, and 200g on the second. Screw slot on Screw C runs across the pistol. |
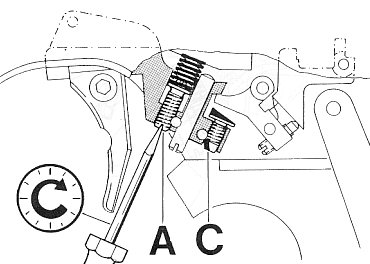 |
Variant 1 This shows the heaviest first stage and lowest second stage weight. Here setscrew C is turned in such a way that the facet located on the setcrew – corresponding to the highest point of the screw – is positioned at the left side (as viewed in firing direction). In order to achieve 500g Screw A will need to be turned clockwise. Readjust trigger stop after this adjustment. |
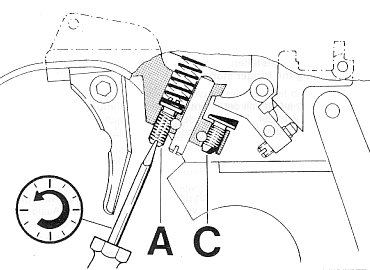 |
Variant 2 This is exactly the reverse from Variant 1. When the facet on the setscrew C shows to the right (as viewed from firing direction) the second stage weight is set at its maximum. Screw A can thereby be turned counter clockwise to reduce to 500+g. Note: Setscrew C can also be set at intermediate positions giving variable ratios of first and second stage weight. |
Grip Adjustment
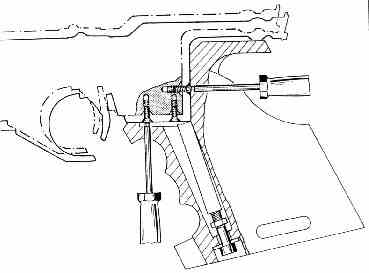
The grip is adjustable and pivotable to the frame in all directions to suit many different hand shapes and positions. To achieve this grip must first be removed.
Adjustment is made by means of six countersunk allen screws in the bottom and rear of the receiver housing. When adjusting these screws only move in 1/4 of a turn increments before replacing grip to see if enough adjustment has been made.
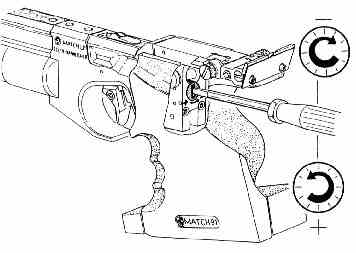
Regulating Pellet Velocity
Remove the grip.
Turn slotted screw in rear of receiver housing clockwise to increase velocity, anti-clockwise to decrease.
