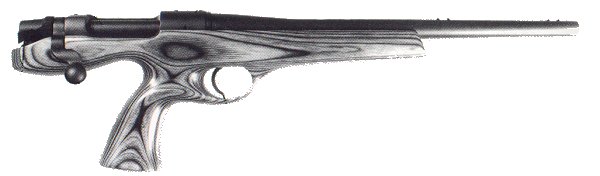
REMINGTON XP100
Removing Bolt

With safety catch on, depress bolt release with a flat key or screwdriver while sliding bolt rearwards, out of the action.
Stripping
|
|
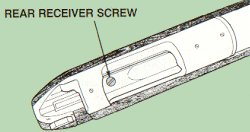
Put safety on and remove bolt. Remove rear receiver screw (as per illustration). Turn pistol upside down and remove forward receiver screw. |
|
|
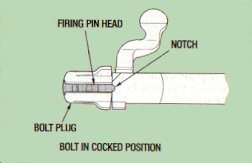
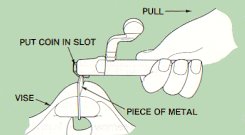
To disassemble bolt: Put the notch on the firing pin head over a metal edge. Pull the bolt assembly away from the firing pin. Put a coin into the slot near the back edge of the firing pin head. Hold the bolt assembly and turn the bolt plug counter clockwise until the firing pin assembly can be removed from the bolt assembly. |
Reassembly
|
|
To assemble bolt: Put the firing pin assembly into the rear of the bolt assembly. Tighten the bolt plug into the bolt assembly with your hand. Pull the coin from the slot in the firing pin head. Turn the bolt plug until the firing pin head goes into the small notch on the rear rim of the bolt. The bolt is now cocked and ready to go back into the receiver (after stock is replaced). |
|
|
Put rear receiver screw escutcheon into position. |
|
|
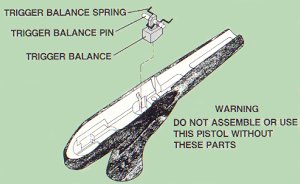
Keep the trigger balance central on its pin for correct alignment with the slot in the trigger link. Place the stock over the receiver and trigger assembly. Replace and tighten the receiver screws. |